How To Use A Green Screen
You can use green screen with video editing software like VideoStudio. Follow along with our tutorial below to learn the easiest way to use green screen. Green screens and chroma key is all about separating the foreground and the background based on color. Use chroma key tools when filming against a green screen or blue screen to composite the subject against a different background. Your subject could be in outer space one minute or at the beach the next in just a few clicks. It’s perfect for projects filmed in a studio or against a homemade green screen. Find out the best way to achieve this effect in VideoStudio Pro below.
-
Install VideoStudio
To install VideoStudio video editing software on your PC, download and run the installation file above. Continue following on-screen instructions to complete the setup process.
-
Record Your Video With a Green Screen
Record your video in front of a green screen or solid colour. We often use green screens as it is a colour that is easily identified and removed with the Chroma Key (“Chroma Key” is the fancy name for the technology used to remove solid color backgrounds like green screens from video).
![Chroma key effect]()
-
Add Your Background Image
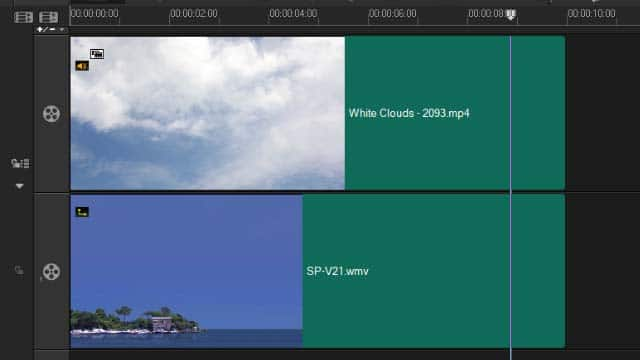
Add your desired background image to the main track of the timeline. This is what will show up when you remove the ‘green screen’ in the other video. Add your recorded video clip to the track immediately below the background track. Double click on the video clip you wish to remove the background in the timeline to open the options menu.
![]()
-
Open the Chroma Key Tool
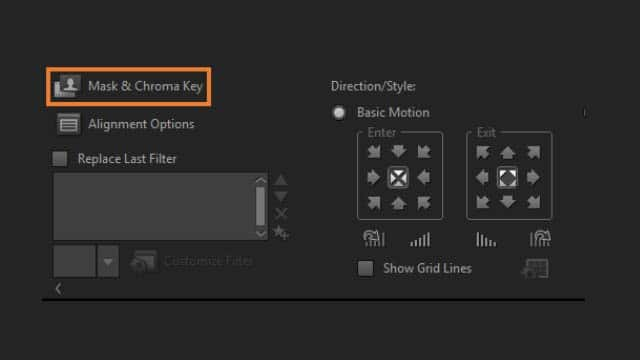
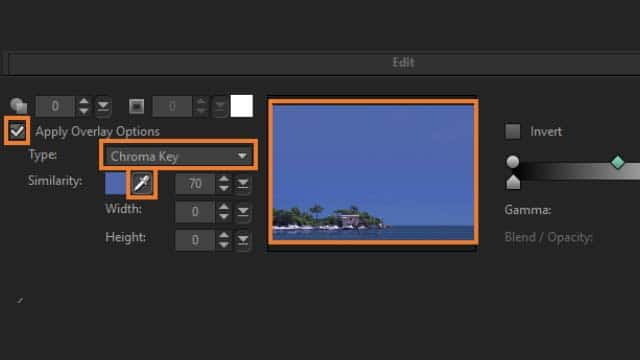
Under the attributes tab, select, ‘Mask & Chroma Key’ and select ‘Apply Overlay Options’ and choose ‘Chroma Key’ in the dropdown menu. The Chroma Key is used to remove a specific color from a video. For example, if you capture a subject against a “green screen” background or cover part of a subject with green, Chroma Key can be used to remove the green. You can then place the subject on another background to change the surroundings or create a special effect such as the appearance of a hovering object.
![]()
-
Highlight the Color to Make Transparent
Once you select Chroma Key, use the eye dropper tool to pick a color from your video in the Preview Window (the color of your green screen). The transparency effect appears in the Preview Window. Fine-tune the settings to get the desired look and application. Experiment with any of the following settings to achieve the results you want (availability of controls depends on the Type you select):
- Gamma — affects image contrast and can be used to lighten (move control to the right) or darken (move control to the left) the overall image
- Min — can be moved to the right to darken the image’s lightest pixels
- Max — can be moved to the left to lighten the image’s darkest pixels
![]()
- Gamma — affects image contrast and can be used to lighten (move control to the right) or darken (move control to the left) the overall image


