How To Make Tutorial Videos
You can make tutorial videos with video editing software like VideoStudio. Follow along with our tutorial below to learn the easiest way to make tutorial videos. While videos often take the form of short films and corporate films, there are plenty of other uses for them as supporting content for other projects. How about tutorial videos? If you’re an expert in your field wanting to grow a YouTube channel, if you have created a piece of software or even if you found a cool way to do something and you want to share it with the world on the web, you can use VideoStudio to make tutorial videos for other people to follow.
Be sure to write a script with the steps you want to complete and read it a few times, this will help you send a better image because you will be well prepared.
With VideoStudio, you can easily record your computer screen and make tutorial videos with voiceover, create custom content for your websites or add context to your presentation. VideoStudio’s screen recording software, Live Screen Capture, is exactly what you need to create your next video tutorial.
-
Install VideoStudio
To install VideoStudio video editing software on your Windows PC, download and run the installation file above. Continue following instructions on the screen to complete the setup process on your system.
-
Open Live Screen Capture
To get started, open VideoStudio’s screen recorder, Live Screen Capture and you can then set the parameters to capture what you are looking for.

-
Define the area to record
First, you need to define the area of your screen to record. You can select fullscreen (default at launch), a select window you have open, or a highlight to define a custom area of your screen and adjust the area manually by pulling on the edges of the frame.

-
Choose settings
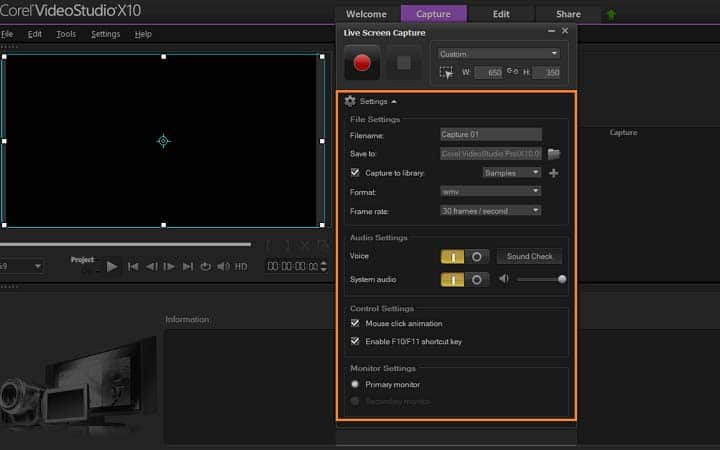
Next, we expand the settings menu to define your file name and location, audio settings, mouse click animations and more. By default, the program captures both your microphone/voiceover sound + your system audio. You can enable or disable these, or connect an external microphone to record from. If you connect an external microphone, select ‘Sound Check’ to identify the device, this will also let you check your voice to make sure you sound clear, professional and can be understood. In the settings menu, you can also identify the frame rate, file format, and enable or disable mouse click animations in your recording.

-
Start recording
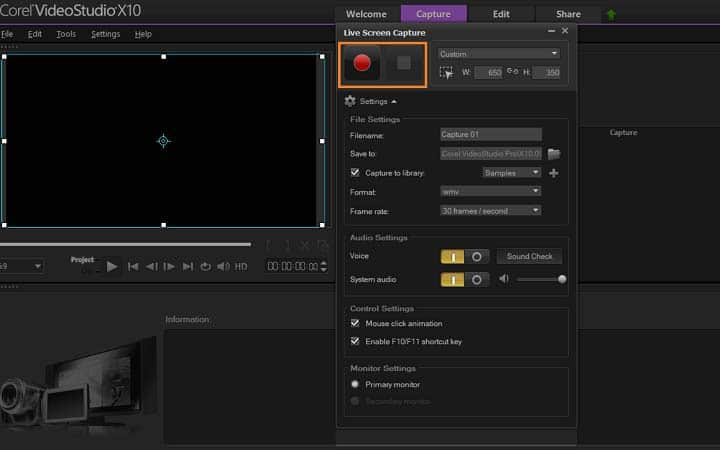
The next step is to begin recording your screen, press the red record button. All activities inside the specified capture area will be recorded. Screen capture starts after the countdown. You can press F10 to stop your recording or F11 to pause or resume the screen capture. Click the STOP button to finish your screen capture. The file is automatically saved to your defined folder destination.

-
Edit your video
You want your viewers to have a great experience, so after you are finished recording your video, you can import the file to the VideoStudio timeline to edit your video (optional). Trim video, add titles, background music and more. Cut video into segments and join them together with smooth transitions. Re-record voiceover.


