How To Make A Movie
You can make a movie with video editing software like VideoStudio. Follow along with our tutorial below to learn the easiest way to make a movie. Do you have a million dollar idea for the next big movie? Instead of waiting for a Hollywood studio to hand over the cash, why not do it yourself? With some like-minded friends you can use VideoStudio to get your movie off the ground and turn it something real. Take full control of the post-production process and produce something that Spielberg would be envious off. Learn how to make a movie in the tutorial below.
-
Install VideoStudio
To install VideoStudio video editing software on your PC, download and run the installation file above. Continue following on-screen instructions to complete the setup process.
-
Import media to library
In the edit workspace, import videos, photos and music to a folder in the library. You can do this by dragging and dropping from a window on your computer screen or by selecting the import button and navigating to the folder where your assets are saved.
![Import media to library]()
-
Add media to the timeline
To start to make your video, select your assets in the library and drag and drop them down onto the timeline. If you’re looking for a way to get polished results quickly, you can use an Instant Project template.
![Add media to the timeline]()
-
Edit video
Once your assets are on the timeline, you can review and trim your video clips, add transitions, effects and more. In the Navigation area of the Player panel, click Clip, and click the Play button, or drag the scrubber along your timeline to move to a certain point in your video. Before you add video effects, trim and position your media how you want it.
![Edit video]()
-
Add titles
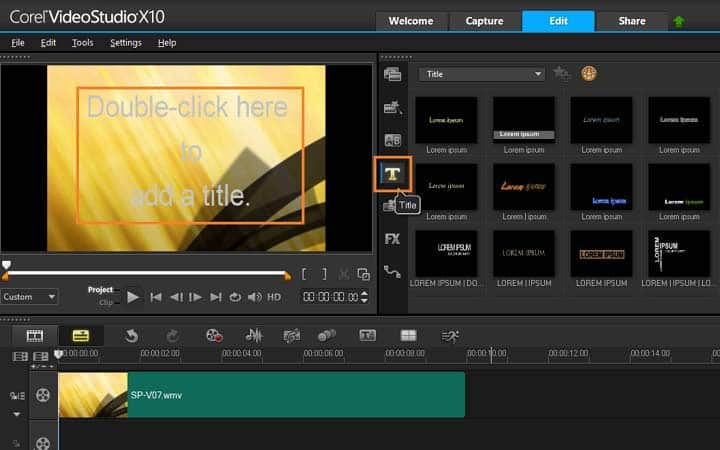
To add a title, drag the Scrubber to the position you want and click the Title button to the left of the Library thumbnails. You can type directly in the Preview Window, but the easiest way to get a professional-looking title, is to drag one of the title thumbnails from the Library to the Title track in the Timeline.
![Add titles]()
-
Add transitions
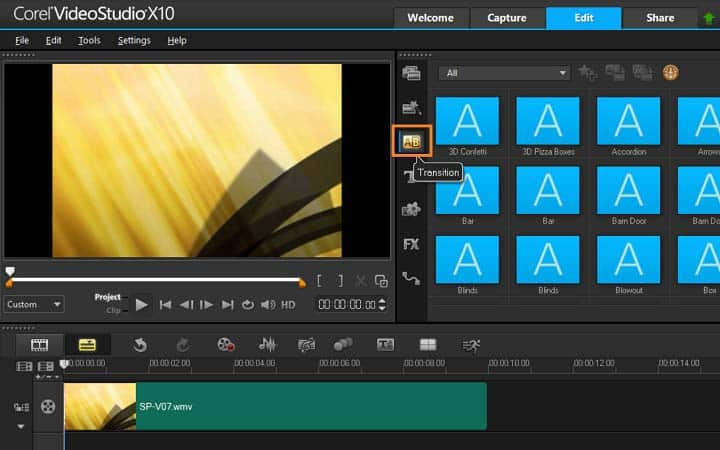
You can add transitions between clips or between photos. Transitions can be used to fade in or fade out or to dissolve one photo into the next. There are many transition options to choose from in the transitions folder in the library. Drag the thumbnail for the transition you want to the Timeline and place it between two clips or photos.
![Add transitions]()
-
Add filters
To enhance images or add filters to your videos, go to the filters folder in your library and drag and drop the filter you wish to apply to your video clips on the timeline.
![Add filters]()
-
Add music
You can add songs from your computer by dragging a music file from the Library to the Music track. You can also use Auto Music to choose royalty-free music to your project, you can access this by selecting the Auto Music button above the timeline.
![Add music]()
-
Export video
When you’re happy with your video on your timeline, it’s time to export your video to share. Before sharing, it’s important to save a version of your project to the native *.vsp format. This will give you maximum flexibility if you choose to edit your project later or if you want to output it to a different format. Click the Share tab to view the Share workspace. Click File > Save, choose a location from the Save in box, and type a name in the File name box. Now you can select how to share it, you can share it to the web (YouTube, FaceBook, Vimeo or Flickr), to disc, or to popular file format. When you’re done, press START and your video will render.


