How To Blur Faces In Video
You can blur an object in a video with video editing software like VideoStudio. Follow along with our tutorial below to learn the easiest way to blur an object in a video. Whether it's for stylistic purposes or because your shot contains some sensitive information you'd rather not share with the rest of the world, the blur effect is a useful tool to get to grips with when editing in VideoStudio. Blurring a shot can also be useful for making the text more legible, for instance when introducing a title to your video and bringing the audience's attention to that instead. Once you know how to implement it the process is a breeze, so read and we’ll help you learn how to blur objects in a video.
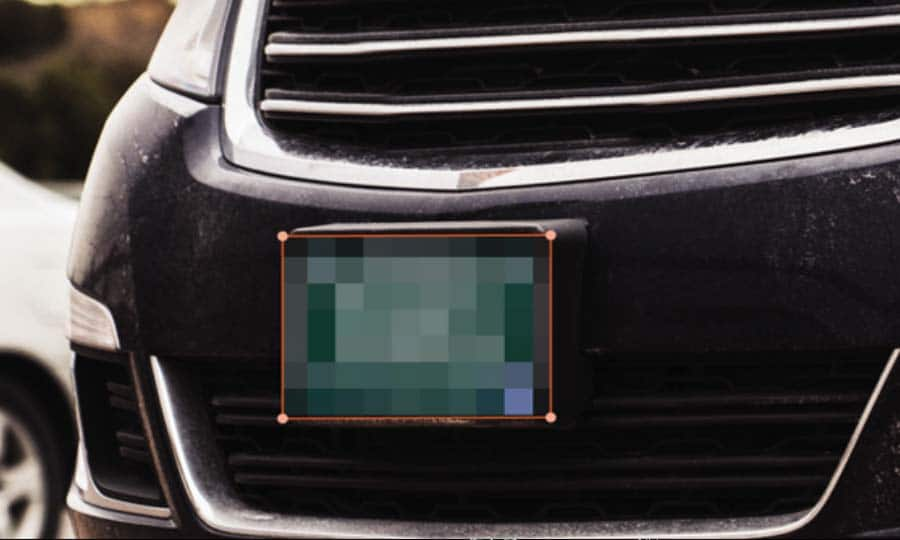
You can blur your whole video by dragging the BLUR icon to your video. Although often times you wish to just blur a section of your video - a face, people, a license plate, a logo, the background, sensitive language, and other content. We can do that with Motion Tracking.
-
Install VideoStudio
To install VideoStudio video editing software on your Windows PC, download and run the installation file above. Continue following instructions on the screen to complete the setup process on your system.
-
Select video clip and select Track Motion
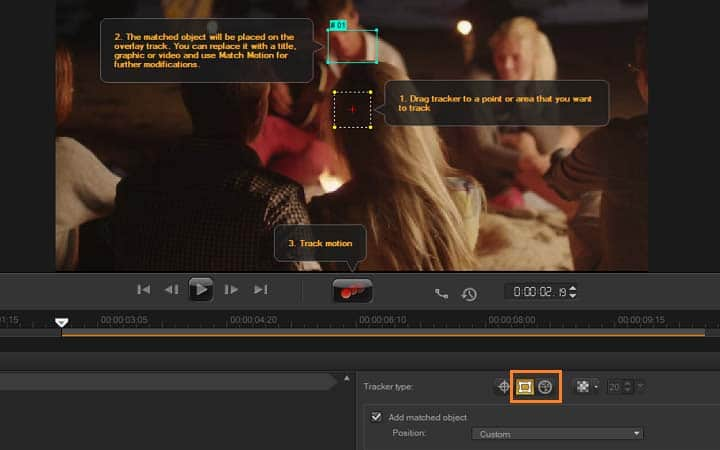
To start open VideoStudio, with your video clip selected on the timeline, click the Track Motion button on the Toolbar, or right-click and select Track motion.
![Select video clip and select Track Motion]()
-
Select Tracker type
Next, in the tracker type area menu, there are two effects to choose from, you can select to set a tracker area (a fixed area) or to set a multi-point area (a dynamic area that adjusts in shape and size as the object is moving). Move your target over the area you wish to track and adjust the size.
- Set tracker as area — a feature that lets you set a fixed tracking area. This gives you a larger sample area but also lets you set the boundaries for a Mosaic blur. You can adjust the shape and size of the tracker by dragging the corner nodes.
- Set multi-point tracking — lets you set a dynamic tracking area that adjusts in size and shape as the object moves closer or further from the camera or changes angles. Drag the four nodes to the inside edges of the area that you want to follow. This type of tracker automatically applies a Mosaic blur.
![Select Tracker type]()
-
Apply mosaic blur
Beside the Track Motion dialog box, click the Apply Mosaic button to enable the mosaic and then click the arrow beside the button to choose a Rectangle or Circle mosaic and adjust the size of the mosaic with the drop down.
![Apply mosaic blur]()
-
Track motion
To watch a preview, click the Track Motion button. The video is played as the tracking path is generated. The area of the tracked object will have a mosaic-like effect when you view the video in the Preview Window of the main program. Click OK and return to the timeline.
After you add effects and edit your video you can choose to share it online via your website, blog, email, YouTube, Facebook, Instagram, Twitter, and other social media sites. Or you can save it to your computer in popular file formats. Make sure that the size of your video is correct for the program you are using on.
![Track motion]()


