How To Normalize Audio
You can normalize audio with video editing software like VideoStudio. Follow along with our tutorial below to learn the easiest way to normalize audio. If you aren’t working with a sound recordist or monitoring and mixing sound yourself when on set, you could find that when you come to edit, your audio peaks and troughs and can be a bit all over the place. Especially if you are filming something that doesn’t have a consistent sound. Normalizing audio is a way to level everything out and make your audio tracks consistent. Learn how to apply it below.
Balancing the volume of multiple clips with Normalize Audio
Normalize Audio automatically balances the volume level for a group of selected audio and video clips. Whether the audio is are barely audible, or loud and clear, Normalize Audio ensures a consistent volume range across all the clips. The volume levels of the selected clips are analyzed and the volume level of the clips with lower volumes is raised to be consistent with the clip that has the highest volume level. For information about adjusting clip volume manually, see Using the Clip Volume Control.
-
Install VideoStudio
To install VideoStudio video editing software on your PC, download and run the installation file above. Continue following on-screen instructions to complete the setup process.
-
Select your audio clips
In the Edit workspace, select all of the audio clips that you want to balance. To select multiple clips, hold Shift and click on each clip.
![Select your audio clips]()
-
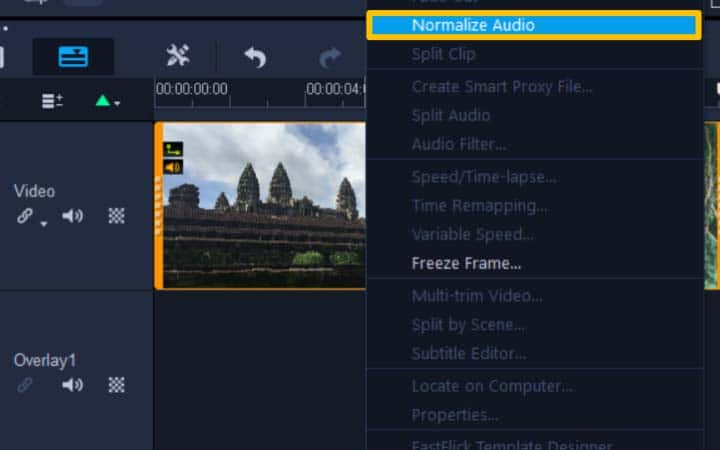
Select Normalize Audio
With the clips selected, right-click a selected clip and select Normalize Audio. This will analyze your clips and raise the volume of clips with lower volumes to be consistent with the clip that has the highest volume level.
![Select Normalize Audio]()
-
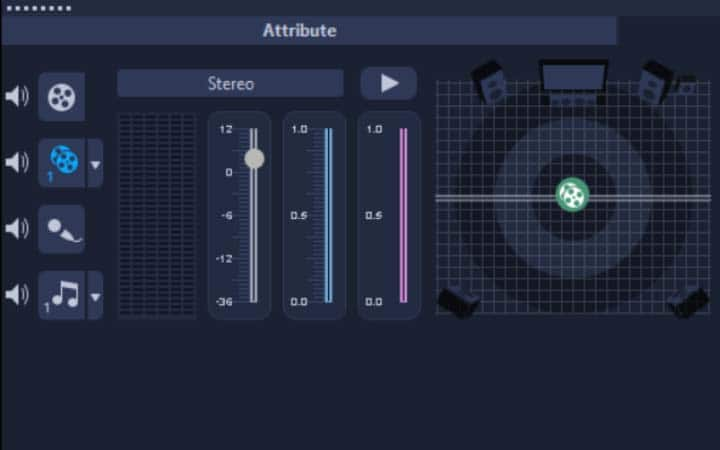
Make adjustments to edit audio
If required, you can make further adjustments to the volume levels in the audio editor to each audio track.
![Make adjustments to edit audio]()


