Create Unique Video Transitions Using Video Masks
Transition between clips creatively using motion from within your footage
Video transitions say a lot about the style of the production. Set your project apart by using a video masks to create unique transitions that blend seamlessly into your footage!
Video masks work especially well for custom transitions that are centered around an interaction or motion in your footage, such as a person walking by, or a door opening. With proper execution, this can lead to very advanced looking effects.
This type of transition also works great with lamp posts or other objects that pass over the foreground of your footage. The mask will be created to expand as the person or object passes across the frame, hiding what is really there and instead revealing the new clip underneath.This type of video mask requires more manual adjustment than others, but is worth it to create truly unique clip reveal effects!
How to create unique transitions using a video mask
Let’s take a look at how to execute a ‘walk by’ type of transition by creating a mask that tracks a person walking across our shot in VideoStudio.
Tip: To execute this effect well, you want to have a clip that shows a clear wipe side to side from the top to bottom of your frames. If a person walks by but does not take up the whole frame, you won’t be able to duplicate this effect properly.
-
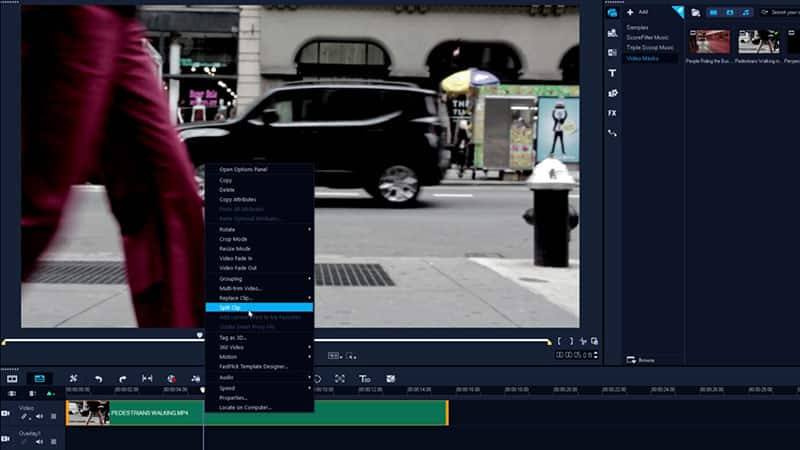
Split your clip
Scrub through your first clip to identify the last frame where there is no space between the person who is walking by and the edge of your shot, and split the clip there to reduce render times while you’re creating your mask. Scrub through your newly split clip again to find the first frame after the person who walks by has exited the shot and split the clip again. Anything after this point can be deleted, as the transition will be complete. Click your newly split clip, and then click the Mask Creator button on the timeline toolbar.
![Split your clip]()
-
Create the mask
Now that you’re in the Mask Creator, scrub through your footage to find the first frame that shows space between the person who walks by, and the edge of your shot. This is the point where your next clip will begin to be revealed, so this is where we’ll begin creating the mask.
Use the masking tools to mask the area shown between the edge of your frame and the person walking through.
![Identify your mask start point]()
-
Track object motion
For best results, only click ‘Detect movement and adjust mask to next frame’. This will allow you to track forwards one frame at a time, as it’s likely that lots of manual adjustments will be needed at first.
![Track object motion]()
-
Make adjustments
For best results, scrub through your created mask frame by frame to ensure no gaps or holes are created where they shouldn’t be. Feel free at any point to click ‘Detect movement and adjust mask to end of clip’ and let VideoStudio automatically begin filling in the remainder of the mask. If you notice it is beginning to include or exclude areas it shouldn’t, click ‘Cancel’ and make corrections with the masking tools.
![Make adjustments]()
Need to Download VideoStudio?
Download a free 30 day trial now!
-
Feather the mask
With natural motion blur already occurring, feathering your mask should help to smooth out the transition between your object and the next clip. Simply click ‘Feather’ and use the slider to adjust the feathering of the mask to fit your liking.
![Feather the mask]()
-
Invert your mask
Before finalizing our mask, we need to invert it as we want everything except the masked area to still be visible. Building the mask to grow with the movement of the person and then inverting your selection will generally be the easiest way to achieve this transition. Preview your mask to ensure everything looks smooth, and click OK to return to the timeline.
![Invert your selection and preview your mask]()
-
Layer clips
Layer your next clip on the timeline beneath your newly created mask, and play the video to ensure the transition is smooth. Jump back into Mask Creator to make final tweaks if necessary.
![Play through and make final adjustments]()
The process to create a video mask for this walk-by clip reveal can also be used to add depth to your titles, making them feel integrated with your scenes. Take a look at how it’s done here.


