GoPro Video Editing: The Ultimate Guide to Editing GoPro Videos
Learn how to capture and edit GoPro videos that will make your friends and family jealous
If you are like most GoPro owners you have probably wondered why the quality of your videos don’t look as good as the ones you have spent hours scrolling through on YouTube. They are all shot using the same camera, so you’re left wondering how those videos look so good.
The difference, editing.

With a GoPro editor you can turn your videos of you cycling down the road into a treat to watch; while the disjointed and jerky direct-from-camera footage of you downhill skiing won’t get you any praise... even from your mother.
If you are a total newbie to video editing it can be pretty intimidating, even just the interface of most video editors can seem a bit overwhelming.
This guide will take you through the process of how to capture the video all the way through to using your GoPro video editor.
Best practices while shooting with a GoPro
Some GoPro owners make the mistake of thinking that expensive accessories or mounts will guarantee a stellar video.
But photography or videography is less about the gear and more about technique.
So here’s the rundown of best practices which will deliver great results regardless of what you are shooting.
Control your frame rate
The fps (Frames Per Second) number plays a very important role in determining whether your final product is going to be watchable or something that makes people want to scroll away from your video.
Need to Download VideoStudio
Download a Free 30-Day Trial Now!
If you are shooting in low light conditions, keep your fps low to let the sensor catch more light. The ideal number is 24fps.
Depending on what fps you are shooting at, you can lower the frame rate in editing to get a slow motion effect. But if you don’t slow it down to the right number your videos will get choppy.
Use this table to get the right percentages so that the footage looks smooth when adding a slow motion effect and be sure to set the FPS setting on your GoPro that is best for your video and environment
| FPS of the original video | Safe slo-mo percentage |
|---|---|
| 48 | 62.5% |
| 50 | 60% |
| 60 | 50% |
| 80 | 37.5% |
| 90 | 33.3% |
| 120 | 25% |
| 240 | 12.5% |
Know your field of view
The field of view, also called FOV is the amount of area the camera lens can cover in front of it. The GoPro has three FOV settings:
- Ultrawide- 170 degrees FOV
- Medium- 127 degrees FOV
- Narrow- 90 degrees FOV
You can think of the FOV in terms of zoom: the smaller the FOV the more zoomed in the video will look; without any deterioration in quality.
Depending on your subject and how much scenery you want to cover you can pick one of these three FOV settings.
The ultrawide setting is the default and effectively captures everything in front of the lens to give you an immersive experience. The other two will give you narrower views.
Educate yourself about resolutions
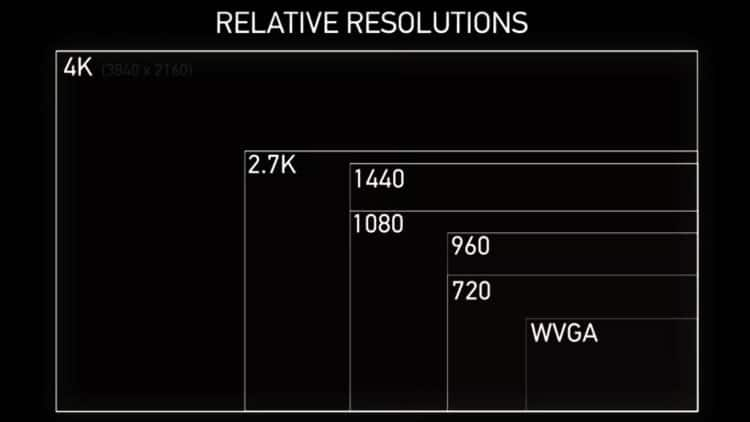
Apart from frame rate, the resolution of the video also has a lot to do with how the final product will look. Most GoPro cameras will allow you to set your resolution from WVGA (low resolution) all the way to 4k (high resolution).
This chart shows you the different resolutions you can use, and their relative aspect ratios.

The higher the resolution the better the video quality will be. The resolution also has an inverse relationship with the frame rate: if you want to bump up the frame rate you will have to cut down on the resolution.
To shoot a great video you will have to take into account all three variables; frame rate, field of view, and resolution. The combination possibilities can get pretty overwhelming for a new user.
So, here is a list of settings you can stick too while exploring your GoPro:
- Regular video: Use 1080p at 60fps. Perfect for most normal conditions. You’ll get full HD quality video.
- Super slow motion: Want to capture fireworks, jumps, exploding objects or anything moving fast? Use WVGA at 240fps.The video won’t look good if it’s blown up on a TV but it works for YouTube or Instagram.
- Point of View: If you have the camera strapped to your helmet or chest, and want to capture more height than normal video settings allow, shoot at 1080 Super View and up to 80fps.
- Slow Motion Point of View: Same as number 3, but with slow motion. Use 720 Super View and 120fps. You will get a video with the aspect ratio of 4:3.
Don’t neglect angles and frames
An unchanging angle can be boring. To keep the video from being monotonous, you will want to different angles to tell different stories about your video.
Don’t just stick to traditional angles like the helmet, chest, or handlebar. Instead, attach the camera facing behind you, or on the hub of the front wheel. The great thing about GoPro is the wide selection of mounts which allows you to mix and match angles to your hearts content.
Need to Download VideoStudio
Download a Free 30-Day Trial Now!
Use a microphone
A great video isn’t just about images. Without clear audio you lose much of the emotional impact.
Although GoPro’s built-in microphone does a fairly decent job of capturing ambient noise, it’s not that great if you want to capture specific sounds or dialog in the finished video.
Get yourself a clip on microphone. You can search on Amazon.com for some cheap options. There is an external microphone in the GoPro accessory kit that comes for around $30 which can be a great starter option.
Keep everything stable
Let’s face it: shaky videos sucks.
Unless your project is a direct homage to Blair Witch Project or you want to show off intense action â la Jason Bourne, you might want to make sure no one gets a headache after watching your video.

The GoPro doesn’t have a built in image stabilization feature. To help reduce shake while shooting you can:
- Strap the camera on your head or chest if you aren’t doing anything very intense.
- Use a tripod or a stable structure if you are shooting from the same position (for something like shooting time lapse videos)
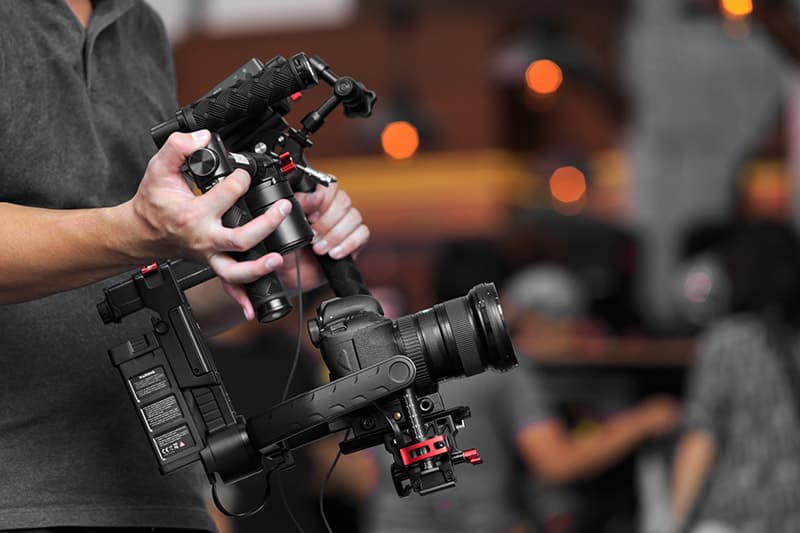
- Use a gimbal, which keeps the camera stable regardless of how vigorously it’s being shaken.
Getting started with video editing
After you have transferred the video from the camera to your computer you will have to open the video editor of your choice, (we think you should choose VideoStudio, but we are bias) import the footage, and start the editing process in the timeline.
Here’s what it will look like if you are using Corel VideoStudio, but this format is more or less the same for any software you are using.
Before you roll up your sleeves and dive into editing, stop to think about the story you want to show. This initial “outlining” will let you speed through hours of footage and save you from wasting time and footage.
Once you have a narrative in mind start with:
- Cropping and trimming: Depending on your the footage you will want to crop and trim it into bite sized chunks, kind of like scenes from a movie. You will also need to select an establishment shot to set the scene. If you want to create something quick to share on social media, you can use the GoPro mobile app to directly view the footage without any transfer, and easily extract a 15-20 second clip to share on Facebook/Instagram.
Need to Download VideoStudio
Download a Free 30-Day Trial Now!
- Zoom: If you want to highlight certain scenes in the video you can zoom in on them, ideally keeping the subject in the middle. Zooming in and out also keeps the video dynamic, and gives a sense of motion to a static subject.
- Rotation: Sometimes, you will mess up and record the video sideways. That will not look good in the final shot, and you will need to rotate or flip the video so that everything looks aligned. The image rotation feature is common to all video editors.
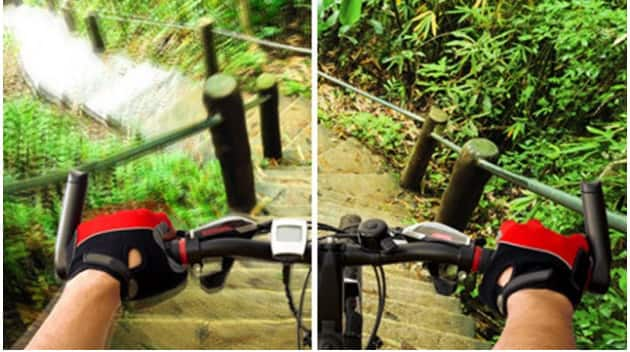
- Stabilization: While there’s no fixing shaky raw footage you can still use the stabilization feature in your editor to smoothen out the videos, and eliminate vibration, wobble, and skew, especially when panning.

By now your video is more or less ready to be uploaded on Facebook. But we aren’t quite done yet.
Adding Video Effects
Any decent video editor will let you add a plethora of effects to your footage turning it from a boring shot to one brimming with life.
In fact, if you are a beginner to video editing it’s easy to get overwhelmed with all of the effect possibilities, and if you aren’t careful it is easy to stuff your video with crazy transitions, color corrections, tone changes, and grading.
Instead, stick with the basics: fade in/fade out, dissolve, split screen, captions, text overlays, slow motion, freeze frames etc.
Even play with speed. Add impact to the moments that matter and add slow motion effects, or even speed up or reverse and replay parts of your video to really focus in on the moment.
Making your video sing
To understand the importance of sound in video try watching a scary movie on mute. Sounds, when inserted correctly, work to accent the visuals on the screen.
When you are working on your GoPro video editing project you can and should add a background score. Where appropriate, you should make sure that the action on the screen matches the tempo of the audio.
This video shows how to add sound to your project using Corel VideoStudio, though the process is more or less same for all video editors.
Bringing it all together
These basic video edits are all that you need to make your videos stand out from all the other amateur GoPro videos out there.
While going through this process will initially take some time you will be able to blaze through the editing stage once you get the hang of the GoPro Editor you are using and develop your own workflow. The process will speed up even faster if you have a system with decent specs and updated software.
Have fun with your GoPro!
Need to Download VideoStudio
Download a Free 30-Day Trial Now!